Tuesday, August 13, 2013

a little B & E in the morning

So, while Neal was back up on Hornby, I was - where? As usual, here on Lopez.  The cat was pleased.

But I did get in some solid tiling sessions.

Because the wood flooring had fresh finish on it, there was only one way to get in the bathroom:  through the window.  So I set up a ladder, and crawled in and out, in and out.  Here's a shot through the window that shows the kickstep for the vanity, and the primer that I painted on the floor.
These are the cardboard dams that I built to contain the floor leveling compound.
And here's why:  we're splurging on heating elements under the tile, for our damp and chilly (9 month long) 'temperate' season.  Here they are, held in place with a glue gun.  I did this on a Saturday morning.  And found out that one of the blue tubes the electricians installed in the wall for the wiring (look to the left in this photo) did not end in the wall box.  Uh-oh.  Now what do I do?

I ended up taping the wire to the wall, and waiting until Monday.  And finding out that the wire exits under the box, not in it.  Well, the upstairs bathroom will be easier.
Then, two bags of leveling compound.  Much easier to use than I expected...how often can we say that??
The travertine floor tile, fully installed (four sessions later) but not grouted.
Here's the shower pan with grouting complete on the left side.  Looks nice with grout!
And here's a photo of the completed floor, grouted and sealed.  The photo looks plain, the actual is fabulous.  We love it.

Wednesday, August 7, 2013

A BIG (gentle) Step

And why is the frig and bathtub in the entry? 

Time to tape off the doorways to rooms with tile floors.  Neal has finished laying the fir flooring.


He rented two sanders, a drum and an orbital.  For three solid days, he followed the things over the floors.  And over, and over.


He asked why the orbital didn't come with a bag to catch the dust it generates.  "They were combusting." he was told.  So he hooked the shop vac up to the sander instead.

I took the sanders back to the mainland, and Neal started applying layers of Waterlox, an oil-based finish that we used in the Studio and liked.  Three days and three coats later, we could peer through the windows at the beautiful floors.


The next morning, he left for Hornby.  When he came home, the floors were dry enough to be walked on (gently).

Sunday, July 14, 2013

Color Blocking

No, not the summer issue of Vogue!  Our woodstove surround...


After installing the front doors, Neal stapled down the floor lining, and started on the fir flooring.  Notice that the window trim is installed and has finish. What a difference trim makes.


Then, halfway through the living room, he started a series of watercolor sketches.  We held these up in front of our faces and squinted, to make them fill the space behind the woodstove.  We choose our favorite, and then he made a plaster sample (see the panel to the left, on the floor).
Here is the completed fresco.  Now he can finish the ceiling molding and the floor.  In the meanwhile, I'm back on the tile in the downstairs bathroom.

Almost forgot. In the midst of things, we had to meet a semi between 11-2:00 on a street in Anacortes, to pick up our kitchen cabinets.
Not knowing how much volume the cabinets would be, or if it would rain, we rented a UHaul for a day, and borrowed a burly truck.  We drove up literally right after the semi arrived, and easily loaded the cabinets in the UHaul.  So easily, Neal decided to go pick up more fir flooring.
We got home, and then realized we had to unload before dark, to get the truck back in the morning.  Kenny, help!!  And he did.  Ken, thank you thank you.
Here's our kitchen, waiting in the laundry room and mud room for the floors to be completed.  We opened one box to see  -   can't wait to install them.

Thursday, June 20, 2013

Where have we been?

I'm getting a sense from Neal (former track guy) that he's sensing the finish line is near.  It's not anything he's said:  it's just that he's ON IT.

If he's not rolling on another coat of paint, he's rustling through the trim pile, or comparing his latest plaster samples.  He comes back on-island with his truck full of wood; fir flooring, bead board, then gorgeous hunks of cedar and fir from Egg Lake Sawmill on San Juan.

Uma's room, with a few paint options on the wall
 (Benjamin Moore now has pints to check color: it's pretty much made for people like us)
And here's her finished room (notice that it's not blue), complete with trim!  It is the last of the alder that we milled from our land.  The live edges on the sills are particularly nice.

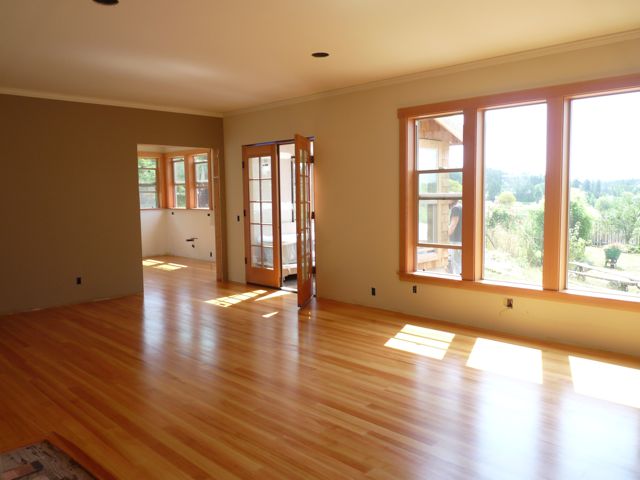
Here's the living room, ready for paint.
This is just one of the combinations we've tried.  You'll have to visit to see the final colors.


Neal at his chopping station, working on window trim.


Deenah, checking out the kitchen.  And, June is for the Gemini's!

Mom is first.  She, Dad and I met at the same
beach we've been going to for - how long - almost 50 years?! She showed me an album she's making of our house construction, a well-timed reminder of just how far we've come in the past year.  Thanks, Mom, it's wonderful!


 Uma's next...


then it's my turn.  Happy Birthdays!!


Tuesday, May 28, 2013

Tiny Pieces

Tiny, TINY pieces.  1/2" by 1/2" mosaic pieces, to be exact.  Yes, they come on 12" x 12" sheets, it's true.  Does that make it easy to install?

Having just gone through an enormous learning curve, I can tell you -   No!  It is not easy to install.

I think it's funny, in a human kind of way, that my first tiling attempt in the house was arguably the most difficult, and I didn't even realize it.  Happily,  I'm confident that I can install the rest of the mosaic tile...but the bottom half of my first wall doesn't make me proud.

Here are some shots that don't do the tile justice.  The glass/marble combination is marvelous in person.

Rubberized coating for waterproofing


First wall, with 12" x 24" porcelain ceramic tile by Pental, fun.


The white areas are where I removed tile in for re-installing (part of the proverbial "learning curve")


The walls are grouted: next are the 2x2's in the pan.


Saturday, April 20, 2013

rock

So when Matthew left for Seattle, suddenly there were ceilings and all of the 12' panels were on the walls instead of stacked on the floor.


Then started days on days of sheetrock mud...and more sheetrock mud...
there was a day when Neal said "I finished putting all the tape on today."
and another when he said "I try not to think about how much is left to mud".


Yo Matt.


The entry with a finished floor!  The first one...

looking more like a kitchen
Looking at these shots, I'm seeing BRIGHT.  Has the cabin ever been Bright?  Don't recall it...

And how's it going?  More mud to go.

Saturday, March 16, 2013

Post-Fluff

What did we do while other people were putting insulation in our house?  Congratulate each other that we weren't doing it.  SOO nice to skip that particular horrible job.

Neal also set up the next phase by doing a sheetrock take-off and special ordering 4 1/2' x 12' sheets.  What?  4 1/2' x 12'?  Thanks to one of our building officials, we found out that such a thing is available.  That means that our 9' ceilings will have only one seam for Neal to tape and mud.

It also meant that we needed help to unload the monster sheets!  Luckily for me, I have tendonitis in one elbow, and am not helping with heavy loads.  Thank you Steven, Kreg, Kenny, and the guys from Sunset for doing my heavy work.


 Then, in true Neal fashion, he decided to do the fresco work in the Studio guest room.  We put on a gypsum base coat four years ago, and the room has waited for the fresco top coat since then.

Neal dug in to a progression of samples on boards, coming up with the final sketch of pear blossoms that is on the dresser in this photo:
On the left wall, the white paper is his "cartoon"-  the traditional way of transferring a full-size image to a wall to be frescoed.  First he mixes the lime plaster (white sand and lime putty),  sprays the wall with water, then trowels on the impasto:
Then he waits.  And waits.  For 4-6 hours, he waits for the plaster to set up to a consistency that will allow him to work.  He tacks up the cartoon (which has tiny holes tracing the image), and pounces colored chalk through the holes on to the wall.  This is his outline when applying the pigment.

Then using a stick to stabilize his hand, he paints the image.  He managed to do two entire repeats before  the next phase of the sheetrock installation started.  GORGEOUS.

The next phase was a visitor:  nephew Matthew arrives!  We adore Matt - he stepped off the plane directly into our tile showroom blitz, and clearly has the Anderson genes for design. Not to mention the Borgersen/Anderson charm!

Second stop on our off-island errand running:  the safety shop, to buy Matt a respirator.  Oh, what fun.

Here's the very first sheet of sheet rock going up.  Note the stylin' respirators.
Three days later, all of our ceilings now have rock.  Incredible, really.  We so appreciate you Matt!!